Sussex Scrapbook ~
Nature walks throughout the year

Replacing the front brake pads on a 2004 FLSTFI Fatboy
The brakes are the most
important part of a motorcycle and so their proper regular maintenance is
essential if they are to perform adequately.
This is a nice quick
job that needs doing pretty often if you use a softer pad than the stock Harley
ones. To get the dealers to do it will cost you a fortune and it really is easy,
so there's no excuse for not doing it yourself.
You will need:
New brake pads
A 12 point, ¼" socket
A 12 point 10 mm socket
A large screwdriver or breaker bar
Brake cleaner or methylated spirits
Old toothbrush
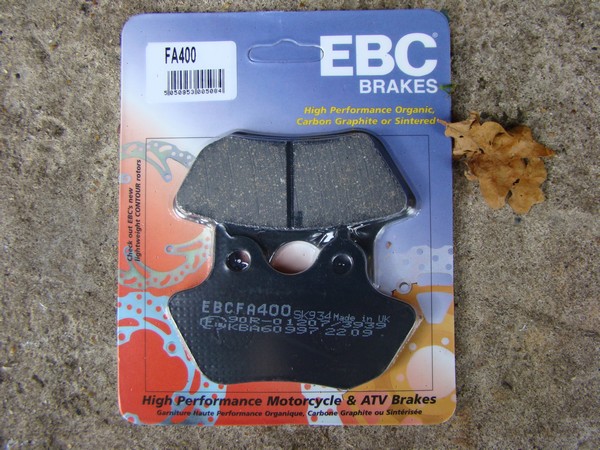
New pads
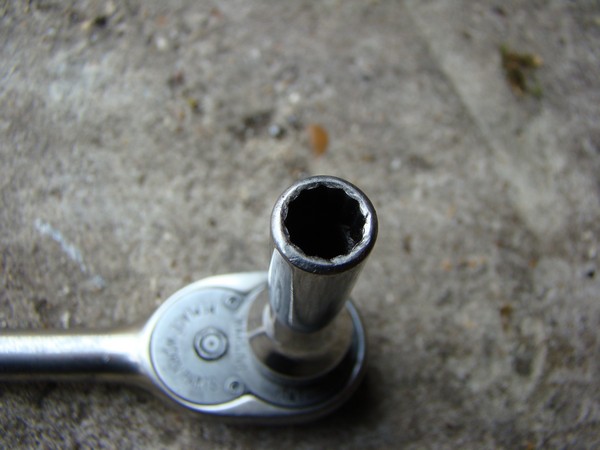
A 12 point, ¼" socket for taking out the 2 pad pins. If you haven't got one, buy one!
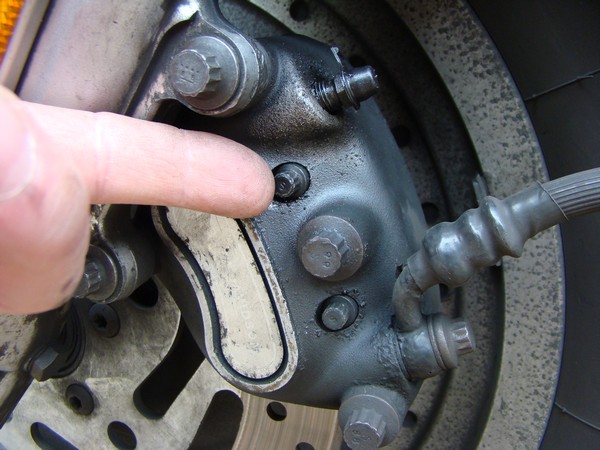
These are the pins that hold the pads in. Leave the big bolt between them alone.

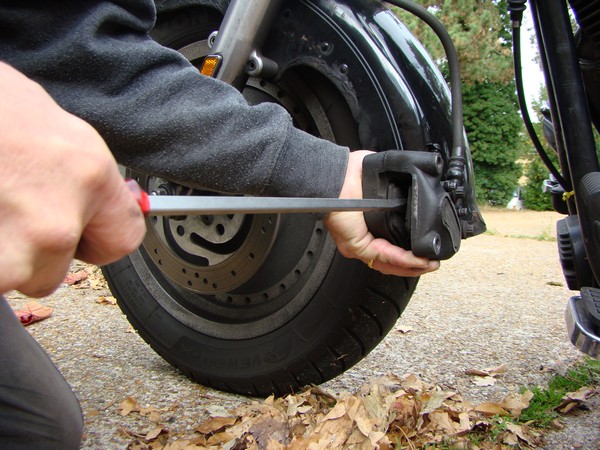
Undo the pad pins now but don't pull them out yet.
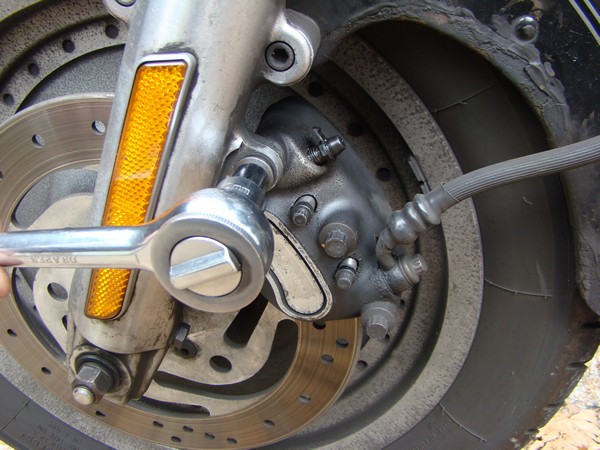
Now remove the two 10 mm mounting bolts
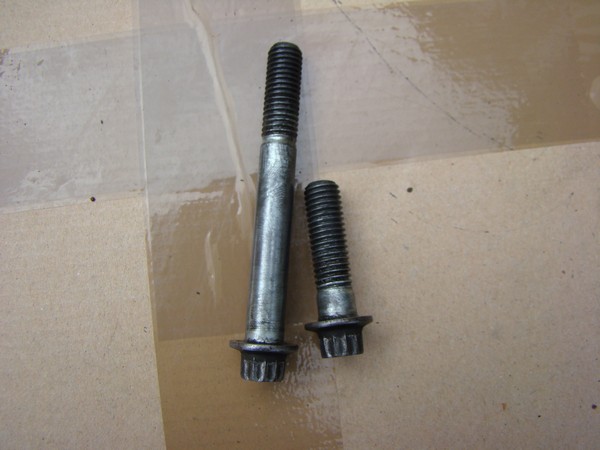
The two mounting bolts. The long one is from the top mounting.
The caliper is safe to let hang by the brake pipe, it won't break.
Use a very large screwdriver or breaker bar to force the 4 round pistons right back.
It doesn't matter if you mess the pads up, you are changing them anyway.
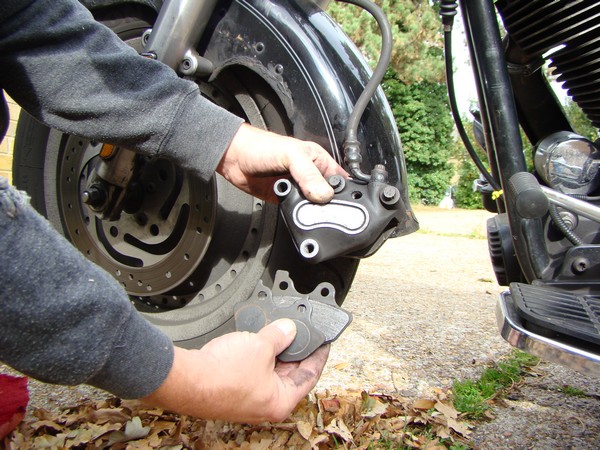
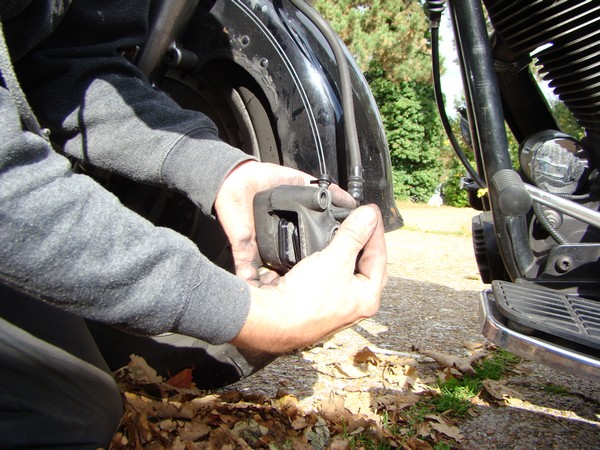
When the pistons are all pushed back you can take the pad pins right out and let the old pads drop out. Important: Take note of the way round the pads go in. The flat sides go to the front of the caliper.
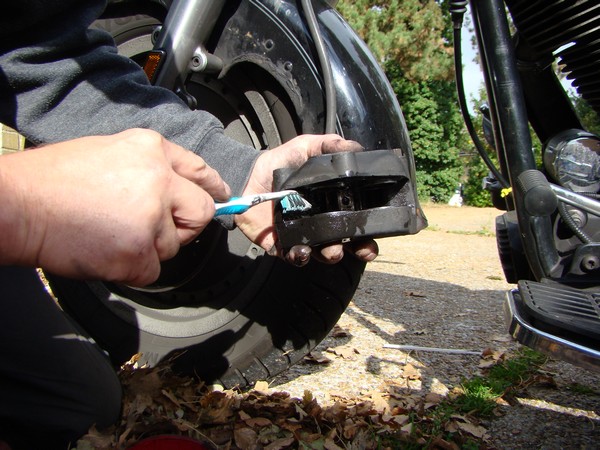
Using brake cleaner or meths and an old toothbrush, clean the entire calliper of
brake dust and pay special attention to the piston faces.
Do a thorough job and make sure it's all clean and dry before you continue.
Check to see that all 4 pistons move when the brake lever is applied. If they
don't, then put your old pads back in and jam a large screwdriver in the centre
between the two pads. Then start pumping on the brake to see if you can get them
to move out. You may have to go as far as using a lubricant to get them moving.
As they start to free up continue cleaning with a toothbrush and meths/brake
cleaner. If they are completely caput and will not budge an inch, then there is
a repair kit with replacement pistons available.
IMPORTANT: Before continuing you need to make sure that all traces of lubricant
are removed. I've found that meths is a good enough solvent for doing this.
IMPORTANT: Do not touch the faces of the pads with your fingers and do not get
any oil, dirt or grease onto them.
Clean your hands and take the new pads out of their packet.
Place the new pads in the calliper the right way around (see above). Hold the pads in place with one hand and push them up against the
anti-rattle spring
plate at the top of the inside of the calliper.
Using the other hand, push the pad pins in through both pads and into their threads,
they should make an audible click when they go into place. Now you can tighten the
pins up completely.
There's no need to do them up too tight, just nip them up. The manual says
180-200 in-lbs (20.3-22.6 Nm).

The pads may need aligning slightly after fitting so that there is a wide enough gap between them to take the disc. This can be done with a small screwdriver. Do not push against the faces of the pads or you will damage them, instead use the metal surround of the pads for purchase. Slide the calliper back onto the brake disc carefully making sure not to damage the pad faces. It will probably be a tight fit, but it will go on if you are gentle. If you forced the pistons right back earlier, then you should have no trouble. Now put the mounting bolts back on, tighten them up and you're done. The brakes wont need bleeding but they may need pumping a few times to get them working properly.
While you're checking your brakes, why not take the lid off of your master cylinder and check for water, sludge etc. If you see some, then the best way to get rid of it is to gently dip a clean, absorbent cloth into the master cylinder and soak up all of its contents. You can then wipe out the sludge in the bottom. If you're careful not to add bubbles while you do so, you can gently top up the brake fluid level without having to bleed the brakes. Even so, it's worth replacing all of the brake fluid completely every six months, which is best achieved by bleeding.